Sunday, October 18, 2020

Canning Apple Sauce

 We've been making apple sauce annually for a long time (since at least 2001). We aren't eating as much apple sauce now as we did when the kids were little, but still like to have it on hand as a side in the winter, on top of pancakes, or to stir into oatmeal. We've always used Haralsons, as they're our favorite apple, developed by the University of Minnesota (which has a globally renowned apple breeding program) about 100 years ago. They're crisp and tart, and delicious for eating, baking and apple sauce.

Over the years we've purchased apples from a variety of different orchards in MN and WI. We opt to buy seconds if available, as it saves money and the apples don't have to be beautiful to make sauce. This year we bought a bushel of seconds at the MN Harvest orchard in Jordan for $35 (a few years ago we were able to buy a bushel of seconds for a cool $20). A bushel is about 40-48 lbs, which has historically yielded about 14-20 one-quart jars of sauce, depending on the apple size/quality, and on how many we eat and bake with prior to making sauce. I usually make an apple pie, and this year I also made this delicious apple fritter bread. This year our yield was 15 qts.

We've gotten faster over the years, and can easily do this in an afternoon, especially if we have 3-4 workers. When we fist started canning, it could stretch for hours and a few times we were exhausted by the end of a later night. As I've kept notes over the years, the most we've canned was in 2010, when we bought 2 bushels and canned 30 qts. 

We're lucky when we can do this on a cooler day- it produces a lot of heat and steam in the house. On warm days in the past, we've opened the windows, but the smell of simmering apple sauce tends to attract swarms of bees to the house.

Ingredients:

  • Haralson apples
  • Cinnamon (a lot- buy the bulk baggie at the store) 
  • Nutmeg
  • White sugar

Equipment:

  • Water bath canner, jar lifter
  • Quart jars and lids. There is a national shortage on lids right now due to the pandemic, so we really had to scrounge our collection and borrowed lids from Andy's mom. Once I can buy lids again, I promise never to be without at least 2 boxes on hand at any time
  • At least 2 large cooking pots
  • Food mill of some kind
  • Several large bowls
  • Cutting boards and paring knives
  • Big wooden spoons, ladle
  • Lots of kitchen towels
  • Nice to have- canning funnel

Process:

  • Fill your water bath canner to the top indent and start heating- it takes a LONG time for this much water to come to a boil. Once it's boiling, let it simmer as you work on the sauce. Periodically check the water line and add water as it evaporates
  • Assemble your clean jars and heat them by running them in an empty dishwasher on the quick cycle without soap
  • Wash the apples in a sink full of water, scrubbing them with a clean dish scrubbing pad
  • Quarter the apples and take out just the seeds and any severely bruised/rotten area. When we do this by hand with a paring knife, it's surprising how much of the apple we retain for cooking. We compost the cores and peels
  • Cook the apples in a big stock pot with a little bit of water at the bottom to prevent burning/sticking. Cook with the lid on, stirring regularly, until the apples are quite soft. By cooking them with the skins on, not only do we save a lot of time and effort with peeling, but we naturally get a lot of the pectin and flavor from the skins so the apple sauce is nice and thick
  • Strain out the peels using a food mill. We used to use a manual old fashioned cone food mill for a number of years, then upgraded to a grinder and food strainer attachments for our KitchenAid mixer. This removes the cooked peels, and makes a nice uniform sauce. We compost our peels and cores, and we have surprising little waste with this method
  • Simmer the sauce for a few minutes and season with cinnamon (generous), nutmeg, and a little sugar until it tastes good. We use very little sugar, as we like the tart taste of the Haralson apples- this year it was about 2-3 Tbsp of sugar per about gallon of sauce
  • When the sauce is ready to can, make sure your jars are nice and hot. Soak your lids for a few minutes in a container of water you've heated to near boiling in the microwave
  • Fill the hot jars with sauce. Do NOT overfill- leave at least 3/4" of headspace. Wipe the tops and exteriors well with a clean damp paper towel
  • Cover with lids and rings, then submerge in your canning bath
  • Once the water bath is back at boiling, set your timer and process the jars in the boiling water for 20 min
  • Remove the jars from the canner and place on a folded towel on a heat-proof surface. You'll gradually hear the lids pop as they cool slightly. Let them cool at least several hours before you move them. Remove rings and double check the seals by trying to lift the lid off the jar. If there are any with failure-to-seal, they can be refrigerated or frozen
  • Clean the kitchen well and mop. Everything will be sticky, and you will have splatter all over the stove, backsplash and counters
  • Wash the rings well, dry them in the oven to ensure they're fully dry, then rub with some vegetable oil before storing them so they don't rust
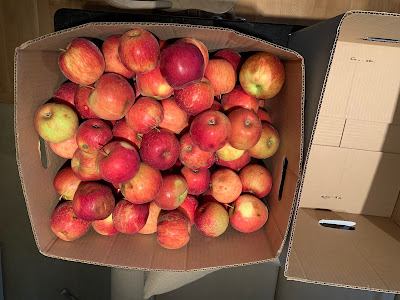
One bushel box (missing some apples we'd already eaten)

Quartering and coring
Lots of bowls

Apple quarters simmering until very soft

The cutting continues...

KitchenAid grinder and fruit strainer attachments

Simmering the pureed sauce and adding cinnamon

Ladling hot sauce into jars

Processing jars in canner

Enjoy some warm

15 quarts in 2020

Entering into the State Fair

Andy has entered pints of apple sauce to the MN State Fair twice with no prize. We think the judges are looking for more of the traditional (sweet and bland with a fairly loose texture) apple sauce. 
State Fair scorecards

Past Canning Sessions

A walk down memory lane. We didn't take pictures early on, but we have a few over the years.
For years we used this cone food mill passed down in Andy's family

2006

2007- looking and feeling very tired

2008
2010

2012- note the remodeled kitchen, done in 2011

2013- the booze helped

2014

2015

2017

Dad's High Protein, No Sugar Granola

 Andy developed this granola recipe with experimentation, and now usually makes a batch a week in the winter. This works very well in a diabetic diet.

Recipe:

1 c oatmeal (reg, not quick)

1 c chopped walnuts

1 c chopped pecan

1 c ground flax meal (Bob's Red Mill)

1/2 c wheat germ

3 Tbsp chia seed

1 c unsweetened coconut flakes

1/2 c olive oil

1/2 c sugar-free maple-flavor pancake syrup

1/2 tsp salt

1 tsp cinnamon

Mix, spread on cookie sheet 40-50 min at 300 f, stirring every 15 min.


Sunday, September 20, 2020

Apple "Hand Pie" Galettes

 I baked something like this several years ago (copied from something we'd seen in a restaurant display). Andy loved and continues to talk about them, but I don't really know how I made them. So, this time I'm going to write it down. 

I wanted a 1.5 recipe of pie pastry to make 4 generous galettes. You'll know from other posts that making pie pastry is not my true love, but occasionally I relent. I calculated 1.5Xs volume from my trusty Better Homes and Gardens cookbook:

1 3/4 c , plus 2 Tbsp flour

3/8 tsp salt

1/3 c plus 3 Tbsp shortening (you can use part butter, I opted to keep this simple)

6-7.5 Tbsp cold water

Follow the pastry drill. It was really dry, so I kept adding water, and then it was a bit too wet. Stupid pastry- this is one reason I don't like making it. I chilled it overnight.

Next day, I divided into four, and rolled each portion out. 

I topped with apple filling, then folded and pleated the crust over the top. The pleats didn't want to stick much. I baked at 375 for 45 min.

Filling (adapted from BHG cookbook)

4-5 C peeled sliced apples (I had a bit more as a result of going wild with the peeler)

1/2 c brown sugar (or less- depends on amount of apples)

2 Tbsp white sugar

2 Tbsp flour

1/2 tsp cinnamon

1/8 tsp nutmeg

Thursday, September 17, 2020

Summer Sangrias

 I'm a fan of sangria, especially lighter versions made with white wine in the summer. Here are my favorite ones so far.

White Strawberry Sangria

1 750 ml bottle dry white wine, chilled (I like Sauvignon Blanc)

1/2 c strawberry schnapps

1/4 c sugar (or a little less)

2 c sliced strawberries

In a pitcher, mix the first three ingredients until the sugar dissolves, then add the strawberries and a lot of ice. You can add other fruit, as well, I love nectarines in summer sangria.


Campari Sangria Spritz

1 750 ml bottle dry white wine, chilled (again, Sauvignon Blanc)

1 c Campari or Aperol

2 c sliced strawberries

4 orange slices, halved

2 c seltzer water

In a large pitcher, combine the wine, Campari and fruit and let infuse for 30 minutes, then add the seltzer. Serve over ice.


Rosé Sangria

2 (750-ml) bottles rosé wine
1/2 cup Spanish brandy
1/4 cup triple sec or orange liqueur, like Grand Marnier
Juice of 1 orange
1/2 cup superfine sugar
1/2 cup sliced fresh strawberries
1/2 orange, sliced into thin rounds, cut in half
1/2 lemon, sliced into thin rounds, cut in half
1/2 plum, pit removed, sliced into thin wedges
1/2 peach, pit removed, sliced into thin wedges
1 (10-oz) bottle club soda, chilled

Combine wine, brandy, orange liqueur, orange juice, and sugar in a large pitcher. Stir until sugar dissolves. Add fruit and stir. Cover and refrigerate until well chilled, about 2 hours (that's what the recipe says- really I just mix it and start pouring). Stir in club soda. Serve over ice if desired. 

Sunday, September 13, 2020

Replacing Canned Pumpkin & Pumpkin Pancakes

I'm in the mood to make a favorite pumpkin pancake recipe, but the pandemic-related food shortages continue. I went to three grocery stores yesterday, and all of them are out of canned pumpkin. Instead, I bought 2 butternut squashes for $2 apiece, baked and pureed them. I have cooked squash in the Instant Pot before, and thought about that approach, but it yields a much wetter finished product and I wanted to end up with denser cooked squash that more closely resembled the canned texture.

Cut squash in half and seed them

Bake face down in oven until tender
I baked them at 350 until tender. I started checking at 30 min, they were done at about 50 min. I let them cool and then scooped the cooked squash into the food processor and pureed until smooth.

I used a food scale to weigh out 15 oz portions (as if canned) and got three portions. I'll freeze these.

Here is one of our favorite pumpkin pancake recipe:

Byerly's Autumn Brunch Pancakes

Good served with apple sauce
Note: if doubling, I've found use 5 eggs rather than 6

1 c unseasoned pumpkin (if doubling, 1 can works)
3 large eggs
1/2 c flour
1/3 c milk
3 Tbsp brown sugar
1/2 tsp baking soda
1/2 tsp cinnamon
1/4 tsp nutmeg
Butter for frying (about 2 Tbsp)

Combine all ingredients except butter for frying. Cook over medium heat about 2 min per side, or until tops bubble and bottoms are brown.

If you want to peel squash to cube and roast it, there's a suggestion to slice off the top and bottom, prick with a fork, then microwave the whole squash for 3 min to soften the peel. I've tried this and the jury is still out- it's just hard to peel squash.

Saturday, September 12, 2020

Coleslaws

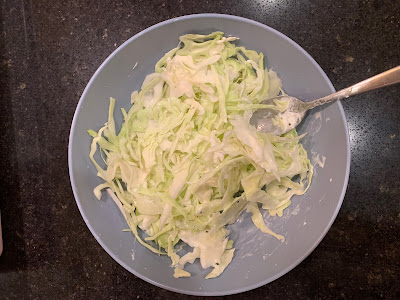
 If you love cabbage like we do, these are good ones.

BARBECUED SLAW

Makes 6 cups.
  • 1 large green cabbage (about 3 lb.)
  • 1 large onion
  • 1/2 c. barbecue sauce of choice
  • 1/4 c. apple-cider vinegar
  • 1 c. water
  • 1/4 c. mayonnaise
Directions

Shred the cabbage and onion into a heat-resistant bowl. In a small saucepan, bring the barbecue sauce, vinegar and water to a boil. Remove from heat, and pour over the cabbage and onion. Stir well to mix.
Chill for at least 1 hour to marinate. Stir in the mayonnaise and serve, or cover and refrigerate for up to 3 days

CABBAGE SALAD WITH SPICY LIME VINAIGRETTE

Serves 6.

Note: There will be extra vinaigrette left over. Adapted from Alex Roberts of Brasa in Minneapolis

  • 1 tbsp. coarsely chopped shallots or onion
  • 1/4 c. fresh lime juice (about 2 limes)
  • 1 tsp. sugar
  • 1/2 tsp. salt
  • 1 serrano chile, seeded and coarsely chopped, if desired
  • 1/3 c. oil
  • 1/3 c. sour cream, at room temperature
  • 1/2 head green cabbage (or a 10-oz. bag of finely shredded cabbage)
  • 1/4 c. chopped fresh flat-leaf parsley
  • 1/4 c. chopped fresh cilantro leaves
  • 1/4 c. chopped fresh mint leaves
  • Salt and pepper

To make vinaigrette: Mix shallots with lime juice, sugar and salt. Let stand for 10 to 15 minutes. In a blender, purée shallot mixture with chile, oil and sour cream until smooth. Set aside. To make slaw: Use a mandolin or grater and shred cabbage as finely as possible. In a bowl, toss cabbage with parsley, cilantro and mint. Add about 1/2 cup vinaigrette to taste and toss. Season to taste with salt and pepper. Add more vinaigrette, if desired. Garnish with sesame seeds.

Garlic Coleslaw

This is inspired by the incredible garlic aioli coleslaw we had at the South Shore Grill in Honolulu

  • 1 medium head green cabbage, finely shredded
  • 3 tablespoons finely chopped garlic
  • 1 ½ teaspoons kosher salt
  • ⅓ cup oil
  • ⅓ cup mayonnaise
  • ⅓ cup apple cider vinegar
  • ¼ teaspoon ground paprika
  • ¼ teaspoon ground white pepper
  • ⅛ teaspoon white sugar
  • ⅛ teaspoon celery seed

Combine dressing ingredients in a blender. Pour dressing over shredded cabbage and toss to evenly coat. Press coleslaw down into the bowl using the back of a spoon or place another bowl on top. Cover and refrigerate for at least 1 hour. Stir before serving.

Ginger Lime and Honey Coleslaw 

Serves 4 to 6.

  • 6 tbsp. fresh lime juice
  • 3 tbsp. honey
  • 1 tsp. soy sauce, or to taste
  • 1 tbsp. freshly grated ginger, or more to taste
  • 2 tbsp. toasted sesame oil
  • 2 tbsp. light sesame oil
  • 2 c. shredded green cabbage
  • 2 c. shredded red cabbage
  • 2 carrots, shredded
  • 1 tart, firm apple, thinly sliced
  • 1/2 c. finely chopped green onion
  • 1/2 c. chopped cilantro
  • Salt and freshly ground black pepper

Directions

To make the dressing: In a small bowl, whisk together the lime juice, honey, soy sauce and ginger. Whisk in the two oils in a slow, steady stream.

To make the slaw: In a large bowl, combine cabbage, carrots, apple, onion and cilantro; toss. Add just enough of the dressing to lightly coat. Season to taste with salt and pepper. Allow to stand about 30 minutes before serving, or cover and refrigerate overnight.


Thai Peanut Cabbage Slaw

Yield: About 10 servings

For the Dressing:
  • 1 Granny Smith apple, peeled, cored & chopped
  • 2 tablespoons creamy peanut butter
  • 1½ tablespoons soy sauce
  • 1 tablespoon sesame oil
  • 1 tablespoon rice vinegar
  • 1 tablespoon water
  • ¼ teaspoon garlic powder
  • ⅛ teaspoon cayenne pepper
For the Coleslaw:
  • 16 ounce bag cole slaw mix (or 5 cups shredded cabbage)
  • ½ red bell pepper, thinly sliced and cut into 1-inch pieces
  • 2 green onions, thinly sliced (white and green parts)
  • 2 tablespoons chopped fresh cilantro
  • 2 tablespoons chopped fresh mint
  • 1 cup green peas, fresh or frozen
  • ½ cup roasted salted peanuts, coarsely chopped
Directions:
1. Puree all of the dressing ingredients in a blender or food processor (the consistency will be like applesauce); set aside.
2. In a large bowl, toss together all of the coleslaw ingredients. Pour the dressing over the coleslaw ingredients and mix until all of the coleslaw is evenly coated with dressing. Cover and refrigerate for at least 1 hour before serving. Leftovers can be kept in an airtight container in the refrigerator for up to 3 days.

Confetti Cabbage Salad With Spicy Peanut Dressing

From America's Test Kitchen

  • 1 lb cabbage, shredded 
  • 1 large carrot, peeled & shredded 
  • salt 
  • 2 tablespoons smooth peanut butter 
  • 2 tablespoons peanut oil 
  • 2 tablespoons rice vinegar 
  • 1 tablespoon soy sauce 
  • 1 teaspoon honey 
  • 2 teaspoons garlic, minced 
  • 1 1/2 teaspoons ginger, minced 
  • 1/2 jalapeno, seeds and rib removed 
  • 4 radishes, sliced thin 
  • 4 scallions, sliced thin 

Directions

1. Toss the cabbage and carrot with 1 tsp salt in a colander set over a medium bowl. Let stand until the cabbage wilts, 1-4 hours. Rinse the cabbage and carrot under cold running water. Press to drain and pat dry with paper towels.

2. Process the peanut butter, oil, vinegar, soy sauce, honey, garlic, ginger and jalepeno in a food processor until smooth.

3. Combine everything in a medium bowl. Toss to coat salad with dressing. Season with salt to taste.

4. Cover and refrigerate until chilled.

Tastier-Than- Heck Oil and Vinegar Coleslaw Dressing

  • 3/4 cup sugar (or a little less, to taste)
  • 3/4 cup vinegar
  • 2/3 cup oil
  • 1 teaspoon garlic salt
  • 1 teaspoon celery seeds
  • 1 teaspoon additional salt 
  • 1 small onion, pureed

Directions
In food processor or with grater,chop the onion so fine it is almost liquefied.
Mix in other ingredients with the ground up onion and using a food processor emulsify the dressing. 
Add to your favorite coleslaw recipe.

Thursday, September 10, 2020

Updating Furniture with Paint

We have a dining room set we got very early in our marriage. The table top is formica- not very attractive, so years ago I painted the table and chairs. What I didn't do then was to put a topcoat/sealer on it, so the paint was starting to erode a bit with use and much wiping. I bought a high-quality topcoat recommended at Hirshfields, and applied three coats. 

After sealing
The chairs are sturdy, but were showing wear and scuffs on the paint. I was tired of periodically touching up the paint, so I decided to intentionally distress them a bit so a few more chips and marks would blend right in. I decided to use an antiquing glaze, which I applied using a dry brushing technique.
Chair before

Chair after
Next, I tackled a smaller set that I'd painted white a number of years ago. The table once belonged to Andy's grandma Margaret, the chairs we assembled from Ikea. I was tired of the all-white look, and it was hard to keep clean (again, I hadn't put a top coat on it) so I decided to try painting it faux driftwood. 
Before
I followed a blend of online instructions, here and here. I put a base coat of Valspar paint in the Behr color "Open Canyon," then I mixed Valspar Mixing glaze with Valspar Harvest Brown on top. I finished with a couple of coats of the polyurethane.
After

After
In October, I drove to Madison to help my daughter fix up a table she'd acquired. It had a few deeper gouges in it that were much lighter than the surrounding finish. My first hope was that we could use regular stain on it, but that very quickly proved it would not work, so back to Home Depot a second time.
I'd read about gel stain but never used it. The table definitely needed more coverage, so I decided to try the Varathane Gel Stain in Kona. The color match with the bottom portion of the table was actually very close, so it ended up being a good choice.
It did take a while to dry, so I started the first of three coats of polyurethane, the same as for the other table projects, at 5:30 the next morning so I could get three coats on before leaving for home. It came out really nicely, and brought some new life to the table.

Addendum:
In Dec 2021 I updated an old twin bed that our daughter used with paint and new pull hardware. I used the same base coat as our dining room table (paint I had on hand) then a mix of Valspar Mixing glaze with Valspar Harvest Brown on top.
Before- note the flower stickers on the end
Before- beat up drawers
After

Aug 2022

Our son is getting his first apartment, and I'm going to put a new guest bed in his room. I didn't want to spend a lot of money on it since it won't get a lot of use. I bought a full mattress set at Original Mattress Company, and found this full bed frame with brass headboard on Craig's for $20. 
I removed the middle section of the finials- too bulbous
I roughed up the brass finish with some steel wool, then spray painted it with 2 coats per side.
$8 at Home Depot
Painting outdoors
End result- I sewed the bedskirt, valances and sham pillows to go with the new comforter cover from Ikea. New end tables for $23 for the pair from K-bid. Canvas prints from Shutterfly

Oct 2022

Will got two end tables from grandma for his new apartment. The tops were pretty beat up, so I sanded and repaired a few spots with glue and wood putty. Then I applied two coats of black spray paint and two coats of matte polyacrylic.

Nov 2022

I bought this folding metal patio set that is a great size for Will's apartment balcony off K-Bid for only $15. It had some mild rust in areas, so I touched it up with a couple coats of spray paint.

Will is happy to work outside on the balcony

April 2024

Our years-old metal firepit is pretty rusty, so I used steel wool to get some of the rust off and painted it all with high-temp flat Rust-Oleum.
Before

After
Our old plastic deck chairs were pretty beat up, too, so it was time for another coat.

After spraying
Our cement pineapple statue was looking rough and a bit moldy, and you could see a distinct line where we glued the top back on after Andy took a spill with it. I bought a tester-sized outdoor acrylic paint in the color 'elephant' and diluted it about 50% with water. Two coats later and it was looking refreshed.